The world of finance is evolving, and mobile payment systems like Apple Pay have played a pivotal role in transforming the way we handle our money. While digital payments have become increasingly popular, there are still situations where physical cash is a necessity. That’s where the innovation of Apple Pay ATMs comes into play. In this step-by-step guide, we will walk you through the process of withdrawing cash from an Apple Pay ATM, making the most of this convenient and secure method.
Introduction to Apple Pay ATMs
What Are Apple Pay ATMs?
Apple Pay ATMs are traditional Automated Teller Machines (ATMs) that have been upgraded to accept Apple Pay as a withdrawal method. This means that you can use your Apple Pay-enabled devices, such as iPhones and Apple Watches, to access your bank accounts and withdraw cash from these ATMs. It’s a fusion of the digital payment world with the need for physical cash access.
Why Apple Pay ATMs Matter
In a world where digital payments are becoming increasingly prevalent, having access to physical cash is still vital. Small businesses, cash-only establishments, or situations where electronic payment methods aren’t available require a reliable way to access cash. Apple Pay ATMs provide a seamless solution, ensuring that you can access your cash when you need it.
Setting Up for Apple Pay ATM Withdrawals
Before you can withdraw cash from an Apple Pay ATM, you need to ensure that your Apple Pay account is set up and ready to use. Here’s a step-by-step guide on how to set up your Apple Pay for ATM withdrawals:
1. Set Up Apple Pay
If you haven’t already set up Apple Pay on your device, follow these initial steps:
- Open the Wallet App: Locate and open the “Wallet” app on your iPhone or the “Apple Watch” app on your Apple Watch.
- Add Credit or Debit Card: Tap on “Add Credit or Debit Card.”
- Enter Card Details: You can manually enter your card details or use your device’s camera to scan your card. Follow the on-screen prompts to complete the setup.
- Verify Your Card: Some banks may require you to verify your card by receiving a verification code through text message or email and entering it into the app.
2. Link Your Bank Account
Once you’ve set up Apple Pay, you can link your bank account to make it accessible for ATM withdrawals:
- Open Device Settings: Navigate to the “Settings” app on your device.
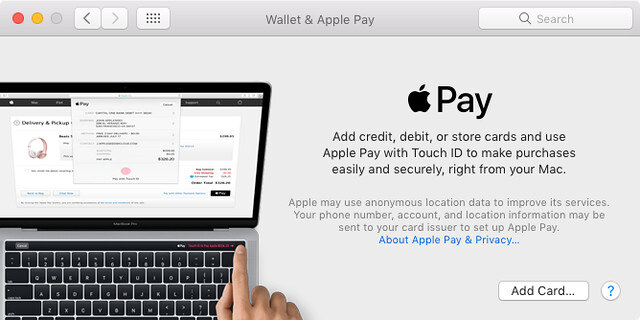
- Access Wallet & Apple Pay: Scroll down and tap on “Wallet & Apple Pay.”
- Add Credit or Debit Card: Under “Transaction Defaults,” tap on “Add Credit or Debit Card.”
- Add Your Bank Account: Follow the on-screen instructions to add your bank account to Apple Pay. This may involve providing additional verification details, such as your card’s expiration date and CVV.
- Verify Your Bank Account: Some banks may require additional verification for added security.
Finding an Apple Pay ATM
To withdraw cash from an Apple Pay ATM, you need to locate one in your vicinity. Here are several methods to find the nearest Apple Pay ATM:
1. Contact Your Bank
Start by reaching out to your bank’s customer service or visiting their official website. Most banks provide ATM locators that can help you find Apple Pay ATMs in your area. Simply enter your location or zip code to get a list of nearby ATMs.
2. ATM Locator Apps
Many major banks and financial institutions offer dedicated ATM locator apps for their customers. Download your bank’s ATM locator app and use it to search for ATMs that support Apple Pay withdrawals in your area.
3. Google Maps
Google Maps is a versatile tool for locating Apple Pay ATMs quickly:
- Open Google Maps: Launch the Google Maps app on your smartphone or access it through a web browser on your computer.
- Search for “Apple Pay ATM near me”: Enter this search term into the search bar. Google Maps will display a list of nearby ATMs that accept Apple Pay.
- Browse Locations: Review the list of results to identify the closest Apple Pay ATMs to your current location.
- Get Directions: Click on a specific ATM location to get directions on how to reach it.
4. Online ATM Locator Tools
Several websites and platforms provide comprehensive ATM locator services. These tools allow you to search for ATMs by location or zip code. Some popular ATM locator websites include ATM Network, ATM Link, Allpoint, and CO-OP ATM locator websites. Click Here
Making a Cash Withdrawal from an Apple Pay ATM
Once you’ve located an Apple Pay ATM and you’re ready to make a cash withdrawal, follow these step-by-step instructions for a seamless transaction:
1. Approach the ATM
First, ensure that the ATM you’ve chosen supports Apple Pay withdrawals. Look for the Apple Pay logo or any other indication that Apple Pay is accepted.
2. Open the Wallet App
Have your Apple Pay-enabled device ready for the transaction. Open the “Wallet” app on your iPhone or the “Apple Watch” app on your Apple Watch.
3. Select Your Card
Choose the card linked to your bank account or debit card that you want to use for the withdrawal. Make sure the selected card is the one associated with your Apple Pay account.
4. Authenticate Your Transaction
To initiate the withdrawal, hold your device close to the contactless payment symbol on the ATM. Follow the on-screen instructions to authenticate the transaction. The authentication process may involve using Face ID, Touch ID, or entering your device passcode.
5. Specify the Withdrawal Amount
Enter the amount of cash you wish to withdraw and confirm the transaction. Double-check that you’ve entered the correct amount, as ATM withdrawals are irreversible.
6. Collect Your Cash
Wait for the Apple Pay ATM to dispense your requested cash amount. Ensure that you collect your money promptly, as the machine may retract it if not retrieved in time.
7. Receive a Digital Receipt
After successfully completing your withdrawal, you’ll receive a digital receipt on your Apple Pay app. These receipts serve as records of your transactions and are invaluable for tracking expenses and maintaining accurate financial records.
Tips for Using Apple Pay ATMs
While Apple Pay ATMs offer numerous benefits, it’s essential to be aware of potential challenges and tips for using them effectively:
1. Limited Availability
Not all ATMs support Apple Pay, so it’s crucial to check for locations that do before heading out to withdraw cash. Be prepared to use traditional ATMs when necessary.
2. Transaction Limits
Some Apple Pay ATMs may impose transaction limits for withdrawals. Check with your bank or the ATM operator for any restrictions on the amount you can withdraw in a single transaction.
3. Compatibility
Ensure that your Apple Pay-enabled device is compatible with the ATM. While most modern iPhones and Apple Watches support Apple Pay, verify compatibility with specific ATM models.
4. Network Connection
To use Apple Pay ATMs, you’ll need an active network connection, either through cellular data or Wi-Fi. Ensure that your device has an active connection before attempting a withdrawal.
Conclusion
Withdrawing cash from an Apple Pay ATM is a seamless process that combines the convenience of digital payments with the necessity of physical currency access. By following the steps outlined in this guide and using the available tools and resources to locate Apple Pay ATMs, you can enjoy the benefits of easy and secure cash access whenever you need it. Whether you’re planning for everyday expenses or preparing for unforeseen situations, having access to cash through Apple Pay ATMs ensures that you’re well-prepared for any financial scenario. So, use this step-by-step guide to make your cash withdrawals a breeze and experience the best of both digital and physical currency worlds.